 But I did have some fun with them.
 I like the "organic ness" of these prints.
 Thanks for stopping by.

It's a place where I come to play and make messes.
But I did have some fun with them. I like the "organic ness" of these prints.
Thanks for stopping by.
 The blue and two dark pinks are erasers and the light pink is one of the first block ones I carved. I don't like it much but I have used the lower left one a lot. It shows up often in my work, so often it's becoming brittle, and dry so I attempted a few more on blocks.
 Oops. I repeated this. I'm sorry. I meant to show you where I drew designs in to piece of craft foam and pieces of an egg carton to create these.
 Talk about some instant gratification. So simple. This last weekend at my mixed media class, I gave everyone a piece of craft foam to create their own stamp on the spot. It was fun to watch the different designs appear and how they used them. I had given everyone a big piece of brown paper to work on and most everyone used their craft foam stamp as a border.
 Oops. I think I repeated this again. This is what happens when google chrome wasn't cooperating this evening and I had trouble keeping my eyes open after waiting for 45 min for me to try and finish this post........
 Did I mention that we all tried my hot glue stencils that I shared with you on yesterday's post? So remember to save that egg carton or foam package from the grocery store. Grab a ball point pen and you'll have a stamp in 5 minutes.... Thanks for visiting.
P.S I didn't repeat after all. Good night my friends. It's time to go. .................
Did I mention that we all tried my hot glue stencils that I shared with you on yesterday's post? So remember to save that egg carton or foam package from the grocery store. Grab a ball point pen and you'll have a stamp in 5 minutes.... Thanks for visiting.
P.S I didn't repeat after all. Good night my friends. It's time to go. .................
 Here's the backside of one of them.
 Here is another one.
 and again, the backside.
 Can you tell I love these colors or should I say this color combination?
So I'm thinking that since I am approaching the 3/4 mark on my blog in terms of followers, I am going to give away one of these accordion books. I will give the 75th person that joins to follow my blog here and goes here me one of these books. Please send me comment with your snail mail address if you are the 75th person. I will mail internationally if you like/want the book.
I haven't been to the party for several weeks so I'm headed over there. If you haven't been there do check it out. You'll find wonderful art and community.
One more thing I wanted to share. Look what sweetness I got in the mail recently from "Fuzzie Fingers" in the United Kingdom.
Can you tell I love these colors or should I say this color combination?
So I'm thinking that since I am approaching the 3/4 mark on my blog in terms of followers, I am going to give away one of these accordion books. I will give the 75th person that joins to follow my blog here and goes here me one of these books. Please send me comment with your snail mail address if you are the 75th person. I will mail internationally if you like/want the book.
I haven't been to the party for several weeks so I'm headed over there. If you haven't been there do check it out. You'll find wonderful art and community.
One more thing I wanted to share. Look what sweetness I got in the mail recently from "Fuzzie Fingers" in the United Kingdom.  I love the card and her art. You can see more of it by going to the party. Thanks for stopping by.
 which became this
  Which when cut up in to 4 x 6's some of which look like this:


 I am sorry about some of the poor pictures. I madly ran around looking for black cardstock to use to show off the pictures since I couldn't find much free clean space on my work table. I need to press the paper before mailing as it's a bit warped from all the layers of glue, paper and everything else. You get the idea. Good way to use up scraps and make some new art. I managed to get 10 post cards out of two large sheets of watercolor paper and what was left I can use for a couple of artist trading cards and the rest of the scraps get used again for something else and so on and so on...... I like them, some more than others. I think I'll do more. I might try it on file folders next.
I noticed a year ago on this date I was working on altering a book and haven't seemed to move past the front cover.
I am sorry about some of the poor pictures. I madly ran around looking for black cardstock to use to show off the pictures since I couldn't find much free clean space on my work table. I need to press the paper before mailing as it's a bit warped from all the layers of glue, paper and everything else. You get the idea. Good way to use up scraps and make some new art. I managed to get 10 post cards out of two large sheets of watercolor paper and what was left I can use for a couple of artist trading cards and the rest of the scraps get used again for something else and so on and so on...... I like them, some more than others. I think I'll do more. I might try it on file folders next.
I noticed a year ago on this date I was working on altering a book and haven't seemed to move past the front cover.
 Yes, I did make it past the front cover and a couple of inside pages. Gee, I must have gotten sidetracked somehow, somewhere a long the line. I want to go back and work on that.
Thanks for stopping by.I hope you are well........................................................................................jo
Yes, I did make it past the front cover and a couple of inside pages. Gee, I must have gotten sidetracked somehow, somewhere a long the line. I want to go back and work on that.
Thanks for stopping by.I hope you are well........................................................................................jo
 My intention is that this will all become mail art. I started with this.
 and it has become this
 . And here's another one.
 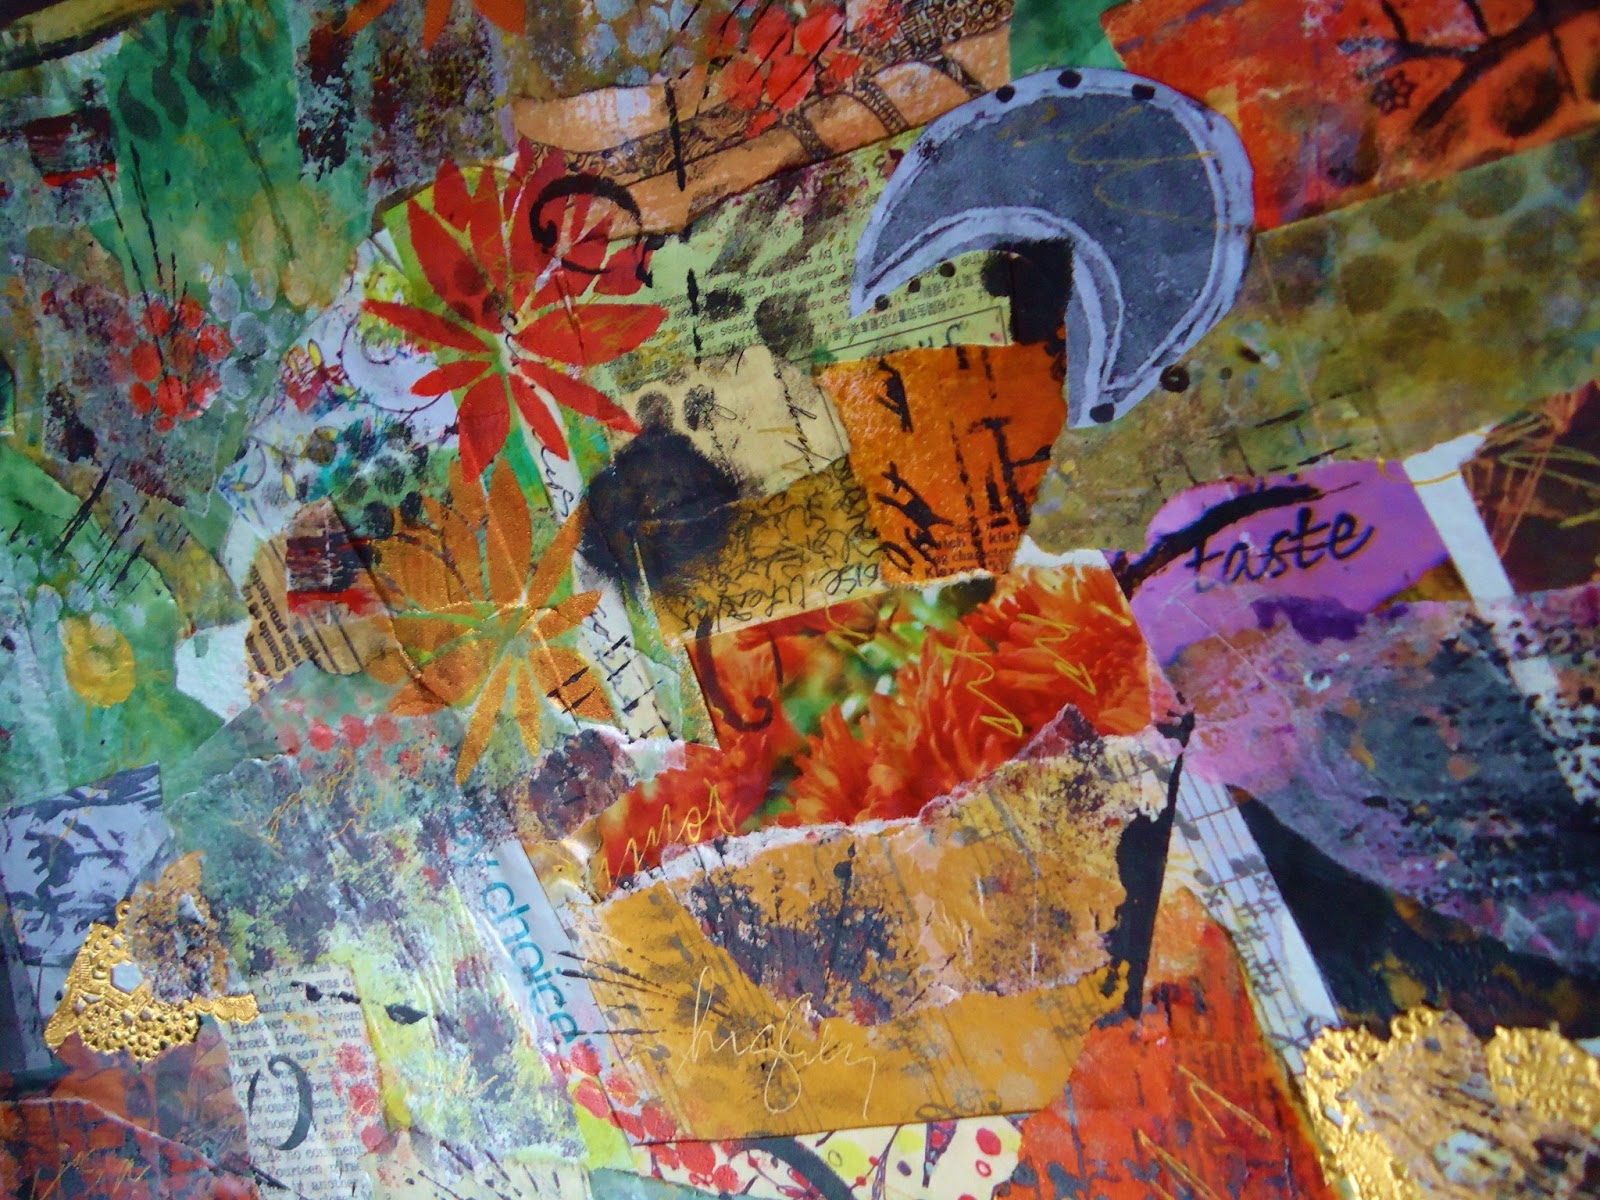 I used scraps of painted on wax paper, markings from trying out my homemade stamps, merchandise labels, pieces of gold doilies from the dollar store,and cut up pieces from my Gelli Plate prints.
I want to finish putting the final touches on with markers and pens etc. Here a couple of close ups.
I used scraps of painted on wax paper, markings from trying out my homemade stamps, merchandise labels, pieces of gold doilies from the dollar store,and cut up pieces from my Gelli Plate prints.
I want to finish putting the final touches on with markers and pens etc. Here a couple of close ups.
 I have made copies of much of my art so I can use them again and again. The people know me pretty well at KINKOS.
My intent is to have these chopped up into 4x6s today so I can mail them out. I'll show you what they look like at the mailing stage later. Then I need to work on getting my taxes done. Yuck!
I hope you have a good day. Thanks for sharing a moment here............................................. jo
I have made copies of much of my art so I can use them again and again. The people know me pretty well at KINKOS.
My intent is to have these chopped up into 4x6s today so I can mail them out. I'll show you what they look like at the mailing stage later. Then I need to work on getting my taxes done. Yuck!
I hope you have a good day. Thanks for sharing a moment here............................................. jo
 Also, I attempted to make some stamps with a glue gun which didn't show up very well with a stamp pad but offered some interesting effects with the gelli plate. Here's a couple of the stamps. I made a couple of them on a heat resistant craft mat, peeled them off after they were dry and glued them to a cardboard square, and a couple of other ones, I made right on the cardboard.
 Tomorrow I will share with you what I made with the stamps and gelli plate. Ah, the gelli plate. The possibilities seem endless. One final note I wanted to share and that is that I have some new pieces in my Etsy Shop. I would love it if you would go there and look. They are posted on the right side of the blog. Thank you.
Thanks for stopping by..............................jo
Tomorrow I will share with you what I made with the stamps and gelli plate. Ah, the gelli plate. The possibilities seem endless. One final note I wanted to share and that is that I have some new pieces in my Etsy Shop. I would love it if you would go there and look. They are posted on the right side of the blog. Thank you.
Thanks for stopping by..............................jo

